Latest Posts

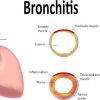
Bronchitis Remedies: Relief from Respiratory Systems Diseases and Related Ailments
There are alternative bronchitis remedies that can help

Side Effects to Watch Out for with the Cabbage Soup Diet
People fall for fad diets because they promise


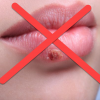
Herpes Erased (HSV Eraser Program) – The Ultimate Herpes Guide- Secrets To Naturally Treat Herpes
Herpes is a common disease that unfortunately has
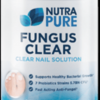
NutraPure Fungus Clear Review – Get Rid of Toenail Fungus for Good?
It may seem easy to treat fungal infection

Embova Rx Review – Embova rx 100% safe affected or a big scam
Sexual tensions lead to undue stress. Medical problems

Jacob’s Well Texas: Fascinating, Mysterious and Dangerous
Jacob’s Well Texas is well-known to be one

A Quick Guide to Finding Calm Dog Breeds for First-Time Owners
Dog temperament is often a major consideration for

- 1
- 2